
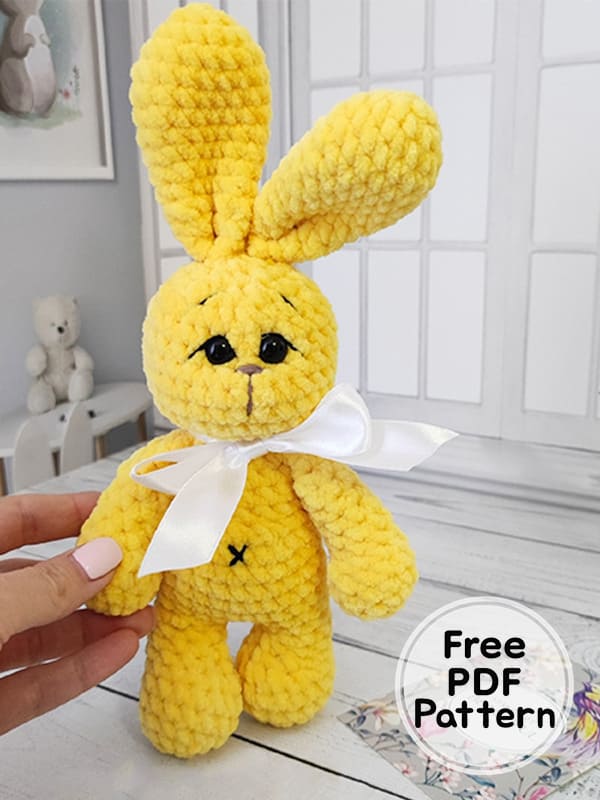
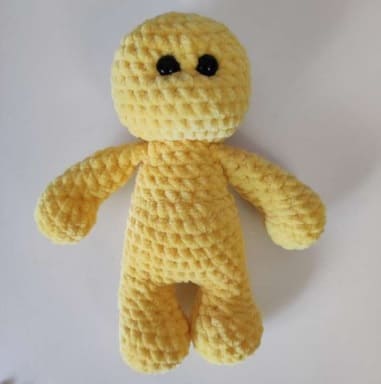
I’m with you guys with the plush crochet bunny pattern. The height of the crochet toy is about 25 cm, including the ears. To make such a crochet bunny, the author used YarnArt Dolce plush yarn and a 4.5 mm hook. The legs, body and head of the crochet bunny are crocheted in one piece, the remaining parts are sewn. The description of the amigurumi pattern is detailed step by step, contains many photos and descriptions from the author that will help you in the process of creating a crochet bunny.
Yellow Plush Crochet Bunny Amigurumi Free Pattern
Designer: Toys_knit_anny
Necessary materials
1) Yellow YarnArt Dolce 761 – 1/2 skein.
2) YarnArt Jeans yarn in additional color 71 – for embroidering the muzzle.
3) Black iris – for embroidering eyelids and eyebrows.
4) Eyes 9 – 10 mm.
5) Hook 4.5 mm.
6) Scissors.
7) A needle with a large eye for stitching parts and with a small eye for muzzle decoration.
8) Fiberfill
Abbreviations
MR: Magic ring
Ch: Chain
Sc: Single crochet
Slst: Slip stitch
Inc: Increase
Dec: Decrease
• The size of the finished crochet bunny is 25 cm (including ears).
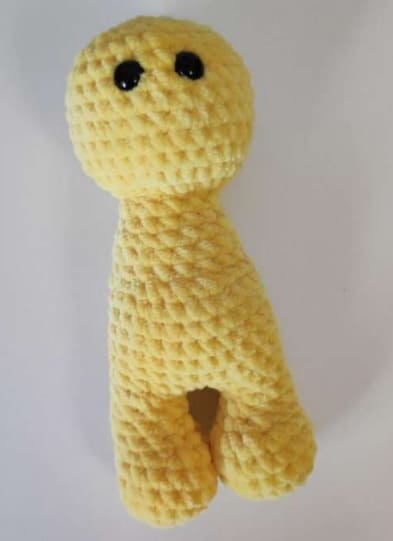
Legs, body and head
Legs, body and head are crocheted in one piece.
We start crochet with legs.
Legs
1. 6 sc in MR;
2. 6 inc (12);
3. 4 sc, 4 inc, 4 sc (16);
4–5. 16 sc (2 row);
6. 5 sc, 4 dec, 3 sc (12);
7. 5 sc, 2 dec, 3 sc (10);
8. 6 sc, dec, 2 sc (9);
9–10. 9 sc (2 row).
We finish the first leg with slst. We cut the thread.
According to the same pattern, we crochet the second leg, but at the end of the slst. DO NOT we crochet and we DO NOT care about the thread.
Now we connect the legs to start crochet the body.
From the second leg we collect 3 ch and then attach the first leg. We need to place the legs clubfoot, so we take the first leg, count 3 loops from the sl st to the right (considering the sl st) and crochet the first sc into it.
In this loop we crochet the first sc after a chain of 3 ch.
We begin to crochet the body.
11. We crochet 9 sc along the first leg, 3 sc along the chain of ch, 9 sc along the second leg, 3 sc along the chain.
Next, we will change the beginning of the row so that it goes along the back.
We crochet 12 sc, put the marker of the beginning of the row. Now it will be here.
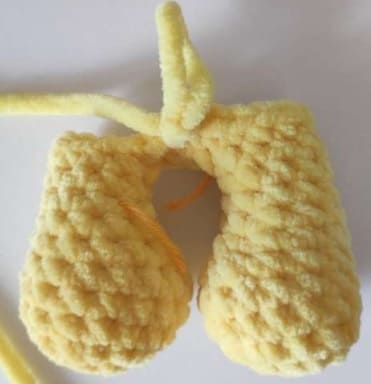
We fill the legs tightly with filler.
12– 16. 24 sc (5 row);
17. dec (on the back), 4 sc, dec (side), 2 sc, 3 dec (on the tummy), 2 sc, dec (side), 4 sc (18);
18. – 19. 18 sc (2 row);
20. (dec, 4 sc) × 3 (15);
21. 15 sc;
22. (dec, 3 sc) × 3 (12);
23. 12 sc.
We fill the body with filler.
This is where the head starts.
24. 12 inc (24);
25. (3 sc, inc) × 6 (30);
26–31. 30 sc (6 row);
32. (3 sc, dec) × 6 (24);
33. (2 sc, dec) × 6 (18);
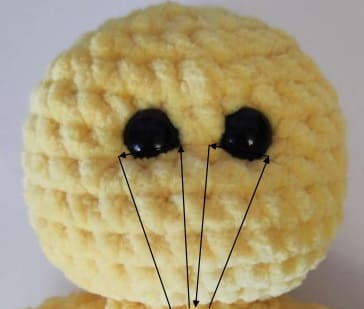
At this stage, we insert the eyes – between 30 and 31 rows at a distance of 2 sc.
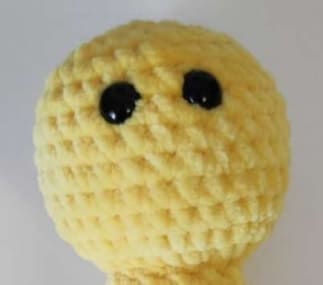
We fill the head with filler.
34. (1 sc, dec) × 6 (12);
35. 6 dec. Pull the hole. Hide the thread.
Upper paws
1. 6 sc in MR;
2. 6 inc (12);
3-4. 12 sc (2 row);
5. 3 sc, 3 dec, 3 sc (9);
6. 4 sc, dec, 3 sc (8);
We fill the palm tightly with filler.
7–10. 8 sc (4 row);
11. (dec, 2 sc) ×2 (6);
We stuff the foot with filler about 2/3 of the part. Just a little above.
12. 6 sc. Fold the foot in half and connect the walls 3 sc. Leave the thread for sewing to the body.
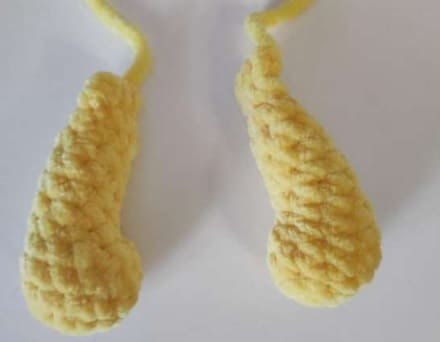
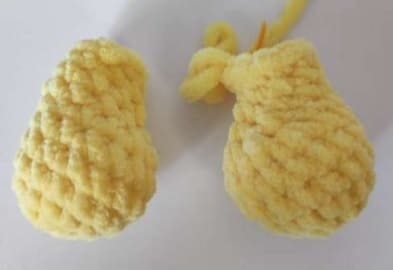
Ears (Make 2)
1. 6 sc in MR;
2. 6 inc (12);
3. (1 sc, inc) × 6 (18);
4–6. 18 sc (3 row);
7. (dec, 7 sc) × 2 (16);
8. 16 sc;
9. (dec, 6 sc) × 2 (14);
10. (dec, 5 sc) × 2 (12);
11–12. 12 sc (2 row);
13. (dec, 4 sc) × 2 (10).

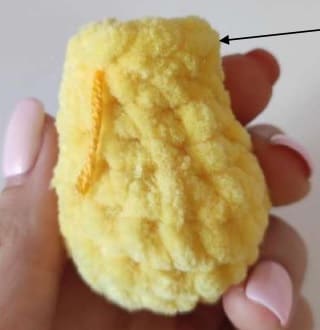
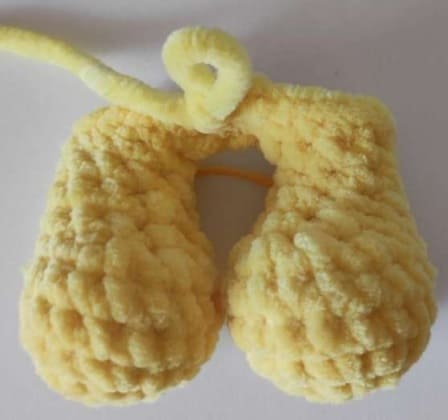
We fold the ear in half and crochet 5 sc for both walls. Leave a long thread.
Again, fold the ear in half and grab at the base, as in the photo.

Tail
1. 6 sc in MR;
2. 6 inc (12);
3. 12 sc;
4. (1 sc, dec) × 4 (8), slst. Leave the thread for sewing.
Fill with filler.
Assembly
1. Sew the paws at the base of the head to the 23rd row.
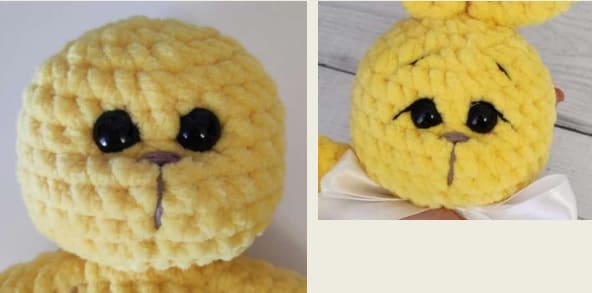
2. We make the muzzle tightening.
3. Sew on the ears.
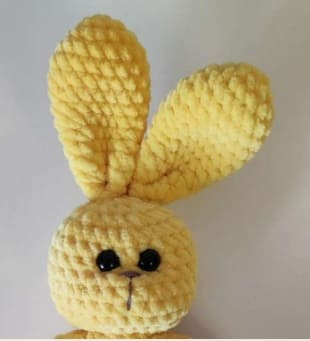
4. Embroider the nose, eyelids and eyebrows.
5. Sew on the tail.


